So i started on my project of mp3 player a few weeks back.
Libraries
All the libraries i could find were designed for Arduino 1.0.1 and the current is 1.5.
I spent some time trying to make it compile and at some point i had it working, once…
As my setup was using the default settings, arduino was installed in program files, and windows was making it difficult to edit files in there.
I gave up, and went back to Arduino 1.0. I used 1.0.4 instead of 1.0.1 as it should be close enough. With Arduino 1.0, one has to install the USB driver manually as there is no installer, just a zip file.
There are basically two options as far as the library is concerned, listed at http://www.elecfreaks.com/wiki/index.php?title=Freaduino_MP3_Music_Shield.
As the shield is based around the VS1053b, there are probably other libraries that will be compatible like http://www.seeedstudio.com/wiki/Music_Shield or http://learn.adafruit.com/adafruit-vs1053-mp3-aac-ogg-midi-wav-play-and-record-codec-tutorial/simple-audio-player-wiring
One set allows to play all tracks and have control over next, previous track, the other allows to play track by name or randomly.
I tried both and with the 1.0.4 sdk it works reasonably well out of the box.
Hardware
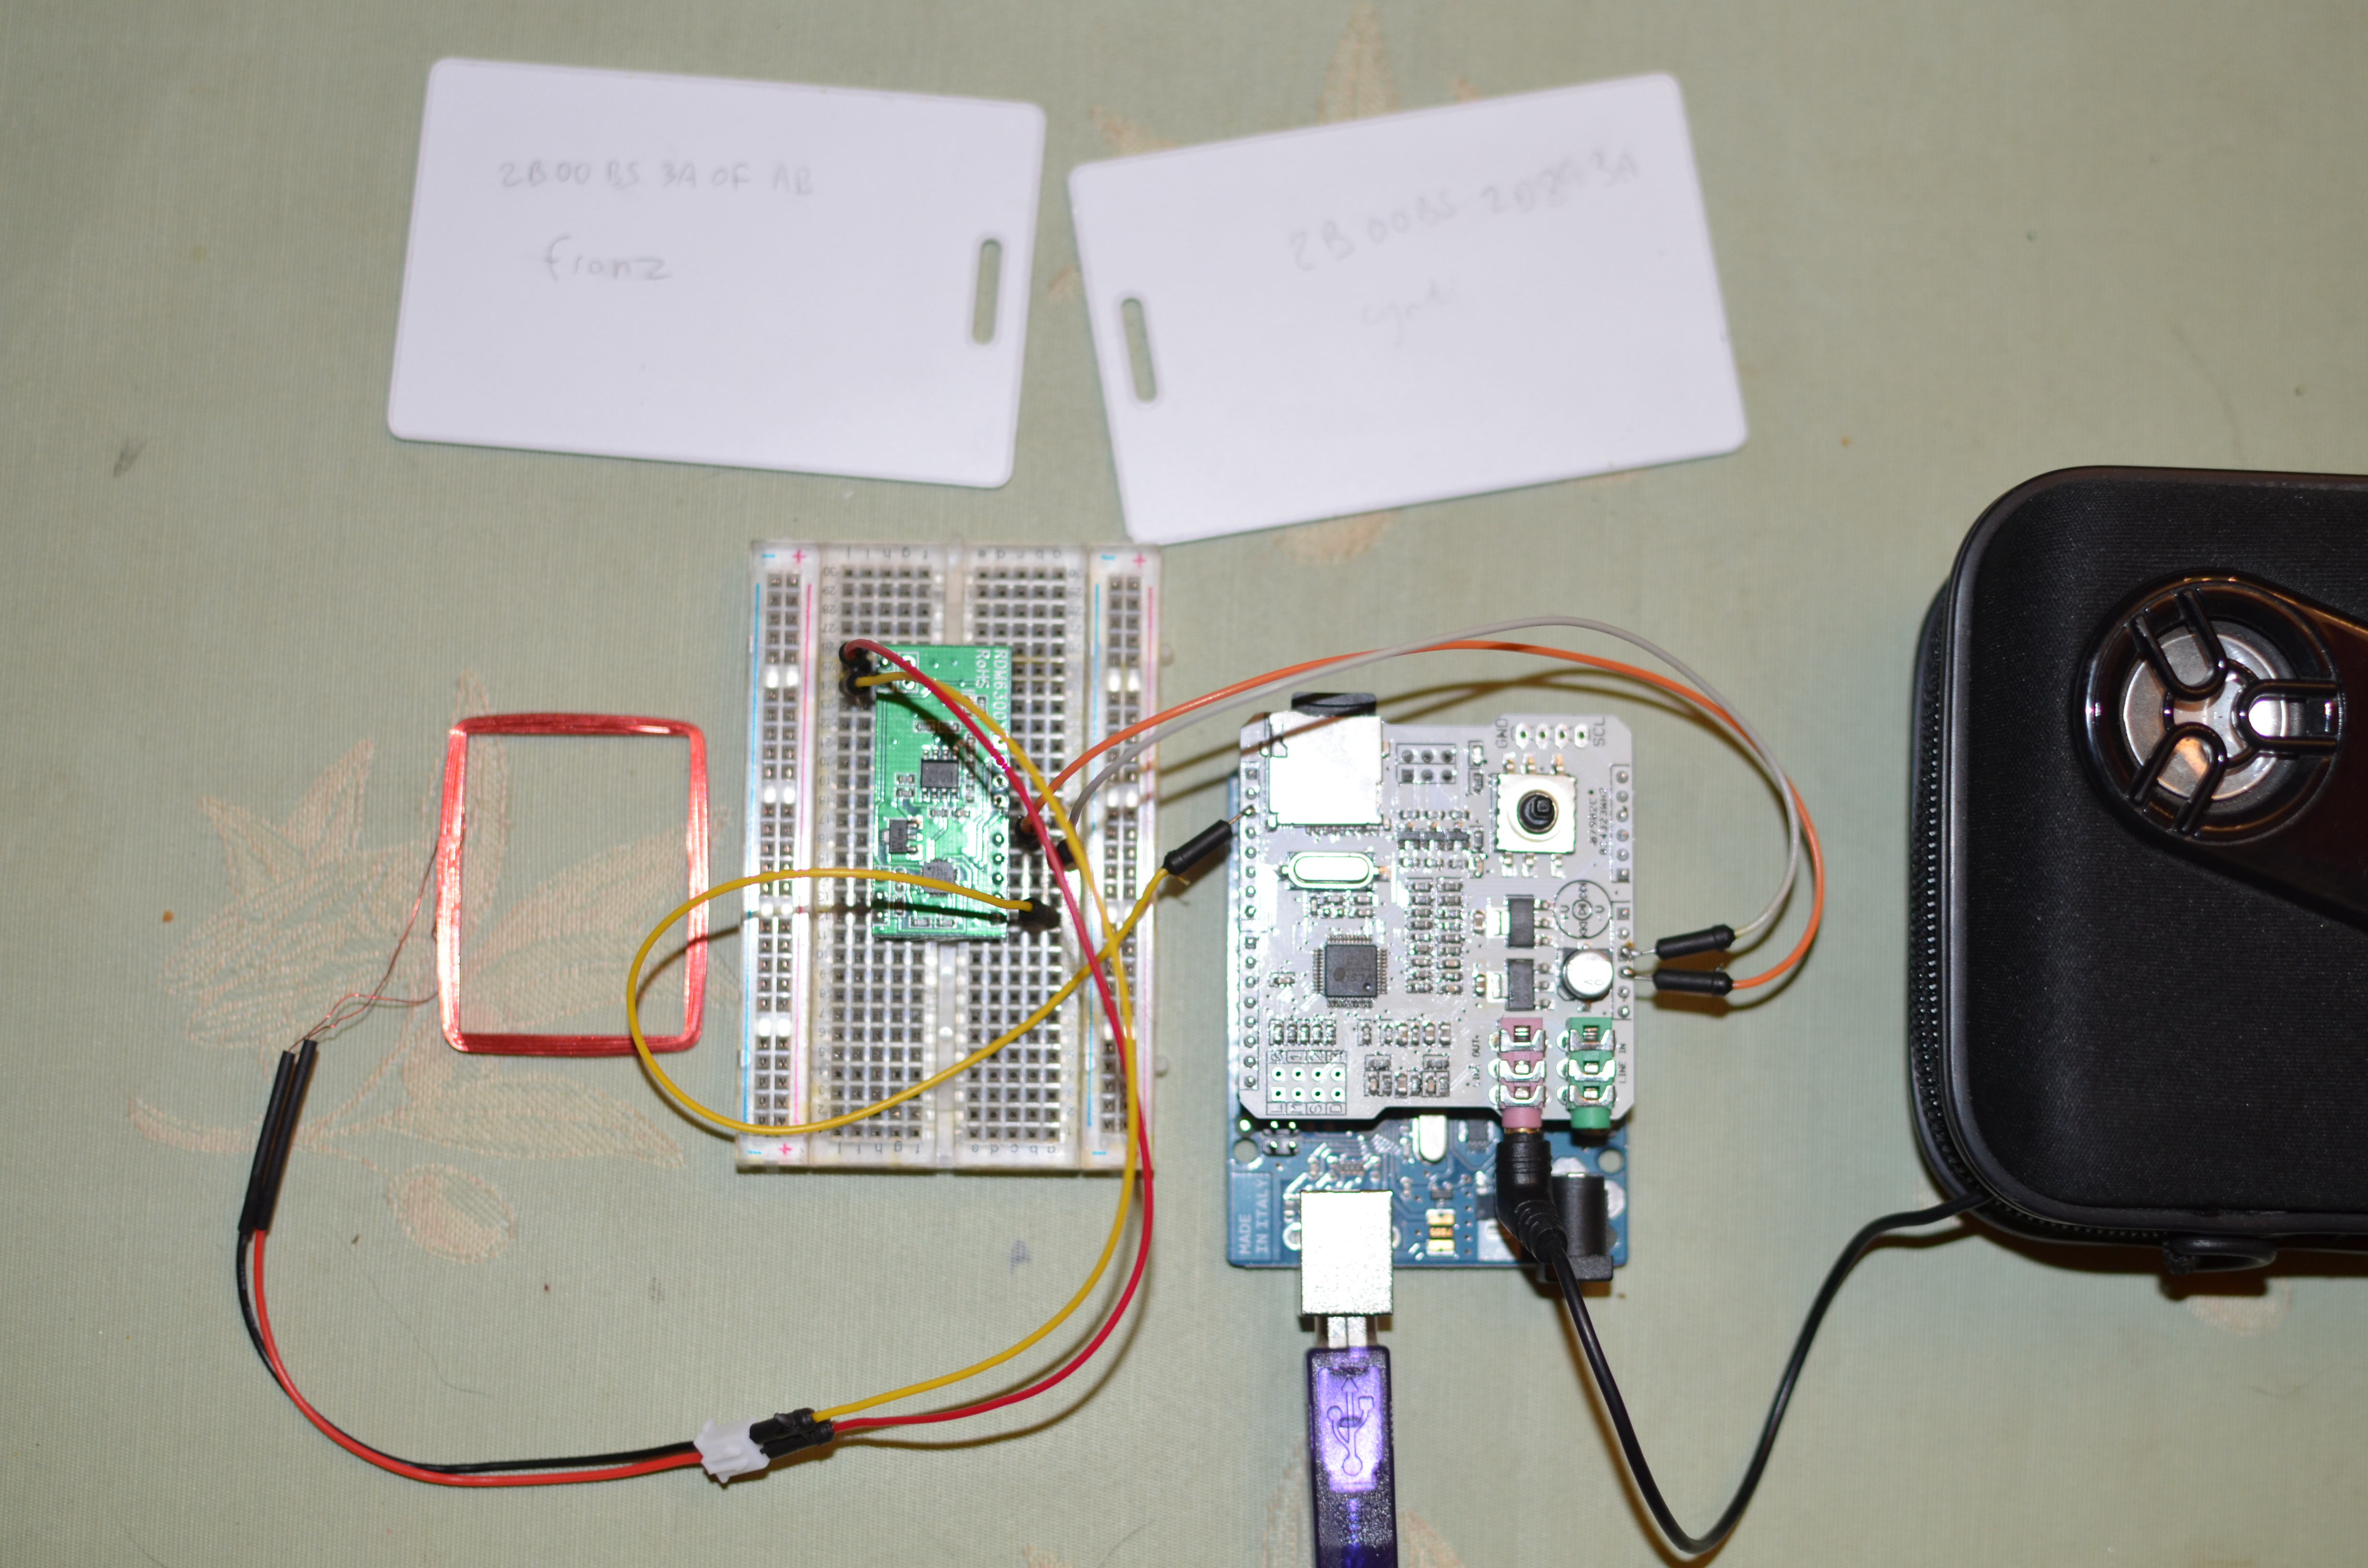
Now i wanted to use the RFID reader at the same time. the mp3 shield is not using the pin 3 on the arduino, however there is no header left to connect to. I ended up soldering directly on the back of the mp3 shield. I only need 3 wires: ground, +5 V and rx from the rfid reader.
Another option would be to replace the headers on the shield with male/female headers like this: http://www.adafruit.com/products/706 or to use a stackable protoshield like this: http://www.adafruit.com/products/51

Software
For the software side, it’s not yet clear to me how i will handle folders.
For now , i just won’t. the card is formatted in FAT16 format, so i can have 512 entries in the root (using 8.3 format)
I will encode each audio file with nnnnxmm.mp3 with nnnn being the album number and mm the track number, for example 0001×01.mp3
For now i will hard code everything, but the plan is to have a table of content toc.txt which will match the cards id with the album number; for example
2B00B53A0FAB 0001 12 (there are twelve tracks on album 0001 whose id is 2B00B53A0FAB.
first script
//  File MusicPlayWithName.ino
//  Demo code for playing any existing music file on Micro SD card by file name
//  For more details about the product please check http://www.seeedstudio.com/depot/

//  Copyright (c) 2010 seeed technology inc.
//  Author: Icing Chang
//  Version: 1.0
//  Time: Oct 21, 2010
//  Changing records:
//
//  This library is free software; you can redistribute it and/or
//  modify it under the terms of the GNU Lesser General Public
//  License as published by the Free Software Foundation; either
//  version 2.1 of the License, or (at your option) any later version.
//
//  This library is distributed in the hope that it will be useful,
//  but WITHOUT ANY WARRANTY; without even the implied warranty of
//  MERCHANTABILITY or FITNESS FOR A PARTICULAR PURPOSE.  See the GNU
//  Lesser General Public License for more details.
//
//  You should have received a copy of the GNU Lesser General Public
//  License along with this library; if not, write to the Free Software
//  Foundation, Inc., 51 Franklin St, Fifth Floor, Boston, MA  02110-1301  USA

/**************************Note*******************************************
 To make this demo code run sucessfully, you need to download the fat16lib
 into your Arduino library at the following address:
http://code.google.com/p/fat16lib/downloads/detail?name=fat16lib20101009.zip&can=2&q=
**************************************************************************/

#include <Arduino.h>
#include <avr/io.h>
#include "config.h"
#include "player.h"
#include "vs10xx.h"

#include <Fat16.h>
#include <Fat16Util.h>
#include "newSDLib.h"

#include <SoftwareSerial.h>

SoftwareSerial RFID = SoftwareSerial(2,3);
char character;
String Card_id;

void setup()
{
  Serial.begin(9600);
  RFID.begin(9600);

  InitSPI();

  InitIOForVs10xx();

  InitIOForKeys();

  InitIOForLEDs();

  Mp3Reset();
  if (!initialSDCard())
    return;

  RED_LED_ON();//light red LED

//  Serial.println("opening toc.txt");

//  if (file.open("toc.txt", O_READ)) {
//  Serial.println("toc opened");

//   int16_t c;
//   String id="";
//   while ((c = file.read()) != ' '){
//    id+=(char)c;
//   }
//   String foldername="";
//   while ((c = file.read()) != '\n'){
//    foldername+=(char)c;
//  }

//  Serial.println(foldername);
//  file.close();
  }

}

void loop()
{
  Serial.println("loop!");

  Serial.println("begin play!");
  while(RFID.available() >0){
        character = RFID.read();
        Card_id+=character;
  }
  if (Card_id.length()>10){
    Card_id = Card_id.substring(1,13);
  }
  Serial.println(Card_id);
  if (Card_id.length()>0){
    if (Card_id.equals("2B00B53A0FAB")){
       playFile("0001x01.mp3");
    }else{
       playFile("0002x01.mp3");
    }
    Card_id= "";
  }
 delay(200);
}
It works!
Left to do:
-1- figure out how to get it to run outside of usb with serial monitor with a 9 V power supply.
-2-buttons for control volume up and down work, but next/previous track do not when playing by name. however this works when using play all example. i need to see how it’s done so i allow navigation inside an album.
-3- case. i think i will use a 50 blank CD spool case. buttons for volume up/down, track next/previous play/pause and reset will be moved outside the box as well as popwer connector and audio jack.
-4-using folders to store files.